Product photography is the art of making products look irresistible through images. Whether you’re selling online, building a brand, or just want to showcase your creations, great product photos are essential. Here’s how to get started:
1. Understand Your Product
Before you shoot, study your product. What are its best features? What story do you want to tell? This will guide your lighting, angles, and styling.
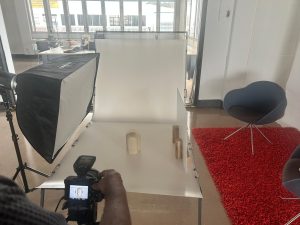
2. Master the Lighting
Lighting is the soul of product photography. It shapes mood, highlights details, and eliminates unwanted shadows. There are two main types:
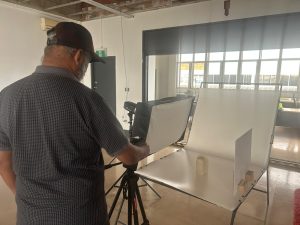
3. Set Up Your Shooting Space
A dedicated product table is a game-changer. It provides a clean, stable surface and lets you control backgrounds and reflections. Pair it with a sweep (a curved backdrop) for seamless, distraction-free shots.
4. Choose Your Camera and Lens
You don’t need the latest gear—just a camera with manual controls and a lens that lets you get close. A tripod is essential for sharpness.
5. Style and Compose
Arrange your product thoughtfully. Use props sparingly, and keep the focus on the item. Experiment with angles and framing until you find what works.
6. Edit and Polish
Post-processing brings your images to life. Adjust exposure, color, and sharpness to make your product pop. Software like Photoshop or Lightroom is your friend here.
How Apopo Studio Can Help
Apopo Studio in Manurewa, Auckland, is designed for creators who want to elevate their product photography. Here’s what we offer:
Why Choose Apopo Studio?
Ready to make your products shine? Book a session at Apopo Studio and let’s create something extraordinary.

